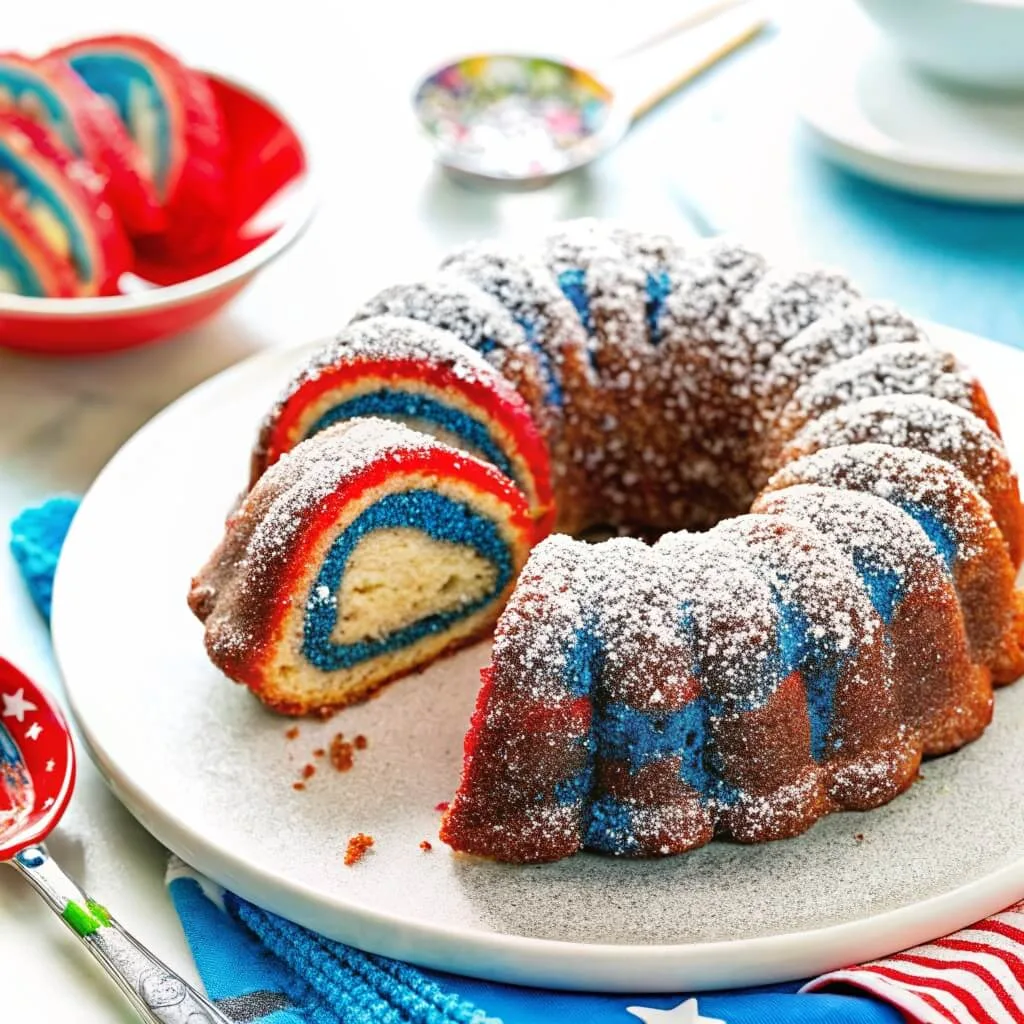
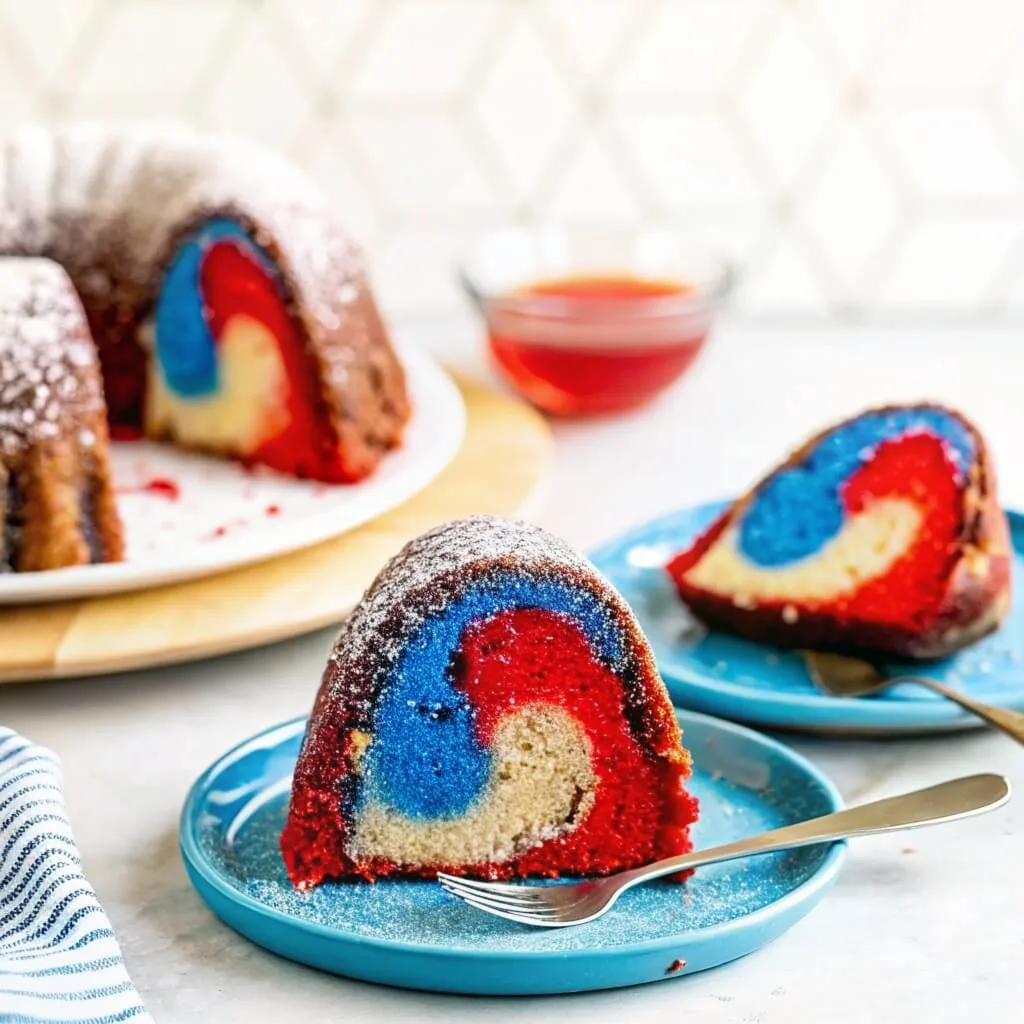
When summer holiday weekends roll around, nothing sets the celebratory mood quite like a brightly colored, thematic dessert. If you are preparing for a 4th of July bash, Memorial Day picnic, or a festive Labor Day gathering, this Red White and Blue Marble Cake is the ultimate showstopper. From the outside, it looks like a beautiful, classic vanilla cake coated in a rich buttercream frosting. But the real magic happens when you slice into it, revealing a vibrant, psychedelic swirl of red, white, and blue batter.
Creating a memorable holiday menu is all about balancing fun visuals with fantastic flavors. Picture setting up an epic summer buffet: you have a massive, interactive Hot Dog Charcuterie Board for the main course, accompanied by an elegant, fresh American Flag Fruit Cheese Platter. Finishing off the meal with this tender, buttery marble cake ties the entire patriotic theme together perfectly. Despite its bakery worthy appearance, it is surprisingly simple to make at home, relying on a basic, foolproof vanilla cake batter divided and tinted to perfection.
Why You Will Love This Recipe
There are so many reasons to make this colorful marble cake your go to summer dessert. First, the visual “wow” factor is completely unmatched. Slicing into the cake to reveal the hidden colorful swirls always yields gasps of delight from guests, especially kids.
Secondly, it is incredibly easy. While it looks like you spent hours meticulously layering colors, the swirling technique takes less than two minutes. You simply drop dollops of colored batter into the pan and drag a butter knife through them. It’s entirely foolproof!
Furthermore, the texture and flavor are out of this world. This isn’t just a gimmick; the cake itself is a phenomenal, tender, and moist vanilla cake with a delicate crumb. It is the perfect sweet treat to follow up a savory summer meal. If you are serving tangy, savory side dishes like a hearty Dill Pickle Pasta Salad, this sweet, buttery vanilla cake provides the ultimate flavor balance to end the afternoon.
The Essential Ingredients
To craft this stunning patriotic marble cake, you will need standard, high quality baking staples.
For the Cake Batter:
-
All Purpose Flour: 2 ½ cups of flour, spooned and leveled so your cake doesn’t turn out dense.
-
Baking Powder & Baking Soda: For the perfect rise and a fluffy texture.
-
Butter: 1 cup (2 sticks) of unsalted butter, softened to room temperature. This provides the rich flavor base.
-
Granulated Sugar: 1 ½ cups to sweeten the cake perfectly.
-
Eggs: 4 large eggs, at room temperature, to bind the batter and provide structure.
-
Vanilla Extract: 1 tablespoon of high quality vanilla extract. Since this is a vanilla cake, the flavor really shines through!
-
Buttermilk: 1 cup of buttermilk (room temperature). The acidity in buttermilk breaks down gluten, resulting in an incredibly tender crumb.
-
Food Coloring: Gel food coloring is highly recommended over liquid drops. You will need a vibrant Red (like “Super Red” or “Tulip Red”) and a deep Blue (like “Royal Blue” or “Navy”).
For the Vanilla Buttercream Frosting:
-
Butter: 1 cup of softened unsalted butter.
-
Powdered Sugar: 3 to 4 cups, sifted.
-
Vanilla & Heavy Cream: 1 teaspoon of vanilla and a splash of cream to reach your desired spreading consistency. Red, white, and blue sprinkles for garnish!
Pro Tip: If you are hosting a large crowd and need a variety of desserts, this vanilla forward cake pairs beautifully with richer, chocolatey options like these decadent Oreo Cheesecake Brownies.
Step-by-Step Instructions
Creating the marble effect is more about having fun than being precise. Follow these steps for a perfect swirl.
Step 1: Prep and Mix the Dry Ingredients Preheat your oven to 350°F (175°C). Grease and flour a 9×13 inch baking pan (or line it with parchment paper). In a medium bowl, whisk together the flour, baking powder, baking soda, and salt. Set aside.
Step 2: Cream the Butter and Sugar In a large mixing bowl or a stand mixer, beat the softened butter and granulated sugar together on medium high speed for about 3-4 minutes until pale, light, and fluffy. Add the eggs one at a time, mixing well after each addition. Stir in the vanilla extract.
Step 3: Finish the Batter Turn your mixer to the lowest speed. Add a third of the dry flour mixture, followed by half of the buttermilk. Add another third of the flour, the rest of the buttermilk, and finish with the last of the flour. Mix just until combined do not overmix, or the cake will be tough!
Step 4: Divide and Color the Batter Divide the batter equally into three separate bowls. Leave one bowl plain (this is your white batter). Add a few drops of red gel food coloring to the second bowl, stirring until you reach a vibrant red. Add blue gel food coloring to the third bowl, stirring until you achieve a rich blue.
Step 5: Dollop and Swirl! Using a spoon or an ice cream scoop, drop alternating dollops of red, white, and blue batter into your prepared 9×13 pan. It should look like a checkerboard of colors. Once all the batter is in the pan, take a butter knife or a wooden skewer and gently swirl it through the batter in a figure eight motion. Do not over swirl, or the colors will muddy and turn purple!
Step 6: Bake and Frost Bake for 28-35 minutes, or until a toothpick inserted into the center comes out clean. Let the cake cool completely. Whip together your buttercream ingredients and spread it in a thick, even layer over the cooled cake. Top with festive sprinkles!
While the cake is cooling, you have plenty of time to prep your chilled make ahead side dishes for the party, such as a fluffy, nostalgic Best Classic Ambrosia Salad Recipe or a sweet and salty Best Strawberry Pretzel Salad.

Easy Red White and Blue Marble Cake
Ingredients
- 2 1/2 cups all-purpose flour
- 1 1/2 teaspoons baking powder
- 1/2 teaspoon baking soda
- 1/2 teaspoon salt
- 1 cup unsalted butter, softened for cake
- 1 1/2 cups granulated sugar
- 4 large eggs room temperature
- 1 tablespoon pure vanilla extract for cake
- 1 cup buttermilk room temperature
- red gel food coloring
- blue gel food coloring
- 1 cup unsalted butter, softened for frosting
- 3-4 cups powdered sugar for frosting
- 1 teaspoon vanilla extract for frosting
- 1-2 tablespoons heavy cream for frosting
Instructions
- Preheat oven to 350°F (175°C) and grease a 9x13-inch baking pan. Whisk together flour, baking powder, baking soda, and salt.
- In a large bowl, beat butter and sugar until light and fluffy. Add eggs one at a time, then mix in vanilla extract.
- Alternate adding dry ingredients and buttermilk, beginning and ending with dry ingredients. Mix until just combined.
- Divide batter into three bowls. Leave one plain, color one red and one blue using gel food coloring.
- Drop spoonfuls of each batter into the pan and gently swirl with a knife to create a marbled effect.
- Bake for 28-35 minutes until a toothpick inserted comes out clean. Let cool completely.
- Beat frosting ingredients until smooth and fluffy. Spread over cooled cake and decorate as desired.
Notes
Storage and Freezing Tips
-
Storage: Store the frosted cake in an airtight container or tightly covered with plastic wrap at room temperature for up to 3 days, or in the refrigerator for up to 5 days.
-
Freezing: This cake freezes exceptionally well! You can freeze the entire baked (unfrosted) cake by wrapping it tightly in a double layer of plastic wrap and a layer of aluminum foil for up to 3 months. Thaw overnight in the refrigerator before frosting.
-
Leftovers: If you have leftover cake slices, they are amazing enjoyed with a cup of coffee the next morning, giving you the same sweet comfort as warm Easy Sweet Cinnamon Twists or a savory Ultimate Breakfast Grilled Cheese.
Frequently Asked Questions (FAQs)
Can I use liquid food coloring instead of gel? You can, but gel food coloring is vastly superior for baking. Liquid food coloring dilutes the batter and requires you to use a massive amount to achieve bright colors. Gel coloring is highly concentrated, meaning you only need a few drops to get a vivid, striking red and blue without changing the consistency of the cake.
Can I make this as a layered round cake instead of a 9×13 pan? Absolutely! You can divide the dolloped batter between two 8 inch or 9 inch round cake pans. Reduce the baking time to about 22-28 minutes, keeping an eye on them.
Why did my colors bleed together and turn purple? This happens when the batter is swirled too much. When dragging your knife through the dollops, you only need to make a few passes (3 or 4 figure eight motions across the pan) to create the marble effect. If you keep mixing, the red and blue will blend into a muddy purple grey.
Can I use a boxed white cake mix to save time? Yes! If you are short on time, simply prepare a standard white box cake mix according to the package directions, divide the batter into three bowls, color them, and swirl as directed. (Be sure to use a white cake mix, not yellow, so your colors stay true!).